How to Organize Your Pantry by Category
To organize your pantry by category, take everything out, sort it into groups like canned goods, grains and pasta, baking, and snacks, then give each group its own zone on the shelves. Put the things you use every day at eye level, heavy items low, and backups up high. Label each zone, put new packages behind old ones, and spend a few minutes a month putting strays back.
That's the whole method. Below is how to do each step, a category list you can copy, and how to keep it from sliding back into chaos.
The short version: empty the pantry and sort on the counter. Pick 8 to 12 categories that match how you cook. Give each one a fixed spot: daily food at eye level, heavy cans and drinks low, backstock and rarely used items on top. Label the shelves, not just the jars. Unpack new food behind old food. Keep cleaning products somewhere else entirely.
Why organize by category?
When every can lives with the other cans and every bag of pasta with the other pasta, you can see what you have in seconds. You notice you're down to one can of tomatoes before you run out, you stop buying a third jar of cumin, and anyone in the house can put the shopping away in the right place. It's also the easiest system to keep up, because "where does this go?" always has one answer.
If you'd rather track what you have than just see it, our guide to keeping track of food at home builds a simple inventory on top of a setup like this one.
Step 1: Empty it and sort
Pick a time just before a grocery shop, when the pantry is at its emptiest. Take everything out and put it on the counter or the kitchen table, sorted into rough piles as you go: cans with cans, baking with baking, snacks with snacks.
While everything is out, check it:
- Look at the cans. The USDA says to throw out cans that are bulging, leaking, heavily rusted or deeply dented. A deep dent is one you can lay your finger into, and any deep dent on a seam means the can goes. A small dent on an otherwise good can is fine, and so is surface rust that wipes off with a paper towel. The FDA adds that stickiness on the outside of a can may mean it's leaking.
- Look at the dates. Most dates on shelf-stable food are about quality, not safety, so an older "best by" date isn't automatically a reason to throw something out. Our guide to Best By vs Use By vs Sell By explains what each one means.
- Combine duplicates. Two half bags of the same rice can become one. Unopened extras go in a backstock pile.
- Pull out anything that isn't food. Cleaning sprays, dish soap and bug spray don't belong on the food shelves (more on that below).
Wipe the shelves down while they're empty.
Step 2: Choose your categories
Use categories that match how you actually cook, not a magazine pantry. A family that bakes every weekend needs a big baking zone; someone who mostly makes pasta and stir fries doesn't. Most kitchens land on 8 to 12 groups. Here is a starting list with where each one usually works best:
| Category | Examples | Best spot |
|---|---|---|
| Canned goods | Tomatoes, beans, tuna, soup | Lower or middle shelf |
| Grains and pasta | Rice, pasta, oats, couscous | Eye level |
| Beans and lentils | Dried lentils, chickpeas | Next to grains |
| Baking | Flour, sugar, baking soda | One shelf or bin |
| Oils and vinegars | Olive oil, vinegar | Near the stove, not beside it |
| Spices | Ground and whole spices | Rack, drawer or door |
| Condiments and sauces | Soy sauce, peanut butter | Eye level |
| Breakfast | Cereal, granola, honey | Easy reach for everyone |
| Snacks | Crackers, chips, nuts | Kids' height, or up high |
| Drinks | Bottled water, juice | Floor or bottom shelf |
| Backstock | Unopened extras | Top shelf |
A few tips for choosing:
- Group by how you use it, not by what it is. If you always make oatmeal with the same oats, honey and raisins, a "breakfast" bin beats splitting them across grains, condiments and snacks.
- Keep one category for backstock. The second jar of peanut butter goes to the backstock shelf, so the everyday shelf only holds what's open or next up.
- Leave a little empty space in each zone. A shelf packed to the edge fills up with food in the wrong place.
This post is about where things go, not what to buy. If you're stocking a new kitchen, our pantry staples list covers that.
Step 3: Give each category a home on the shelves
Now put the categories back, one zone at a time. A layout that works in most pantries:
- Eye level: what you reach for every day. Grains, pasta, the open jar of peanut butter, breakfast.
- Lower shelves: heavy things. Cans, big bags of flour or rice, bottled drinks. They're easier and safer to lift from low down.
- Top shelf: backstock, light bulky items like paper towels, and things you use a few times a year, like cookie cutters or the holiday baking supplies.
- Door or narrow spaces: spices, small jars, packets.
- Deep shelves: use bins you can pull out like drawers, one category per bin, so nothing gets lost at the back.
These are habits, not rules. Put things where they make sense in your kitchen, and keep each category in the same place every time.
Where the pantry itself should be
Location matters more than the shelf liners. The USDA says to store canned food and other shelf-stable products in a cool, dry place, and that temperatures below 85°F (29°C) are best. It warns against keeping them above or beside the stove, under the sink, in a damp garage or basement, or anywhere exposed to temperature extremes. High temperatures, over 100°F (38°C), are harmful to canned goods, and the risk of spoilage jumps as the temperature rises.
So if your "pantry" is the cupboard above the oven, use it for pans and keep the food somewhere cooler.
Keep cleaning products out of the pantry
It's tempting to keep dish soap and spray cleaner on the pantry floor. Don't. The FDA says not to store non-perishable foods near household cleaning products and chemicals. The Consumer Product Safety Commission says cleaning fluids, detergents, soap powders, insecticides and similar products should be stored away from food and medicines, in their original containers, and recommends cabinets with child safety latches or locks. It also warns never to put products like bleach in cups, glasses or bottles used for food or drinks.
Give cleaning supplies their own cupboard, and never reuse an empty food jar or drink bottle for them.
Step 4: Labels and clear containers
Labels are what make the system survive other people. Two kinds help:
- Shelf labels. A label on the shelf edge or bin ("Canned goods", "Baking", "Backstock") tells everyone where things go back. This matters more than labeling every jar.
- Container labels. If you move food out of its package, write what it is and the date you opened or decanted it. Flour and self-rising flour look the same in a jar.
Clear containers are useful for food you go through steadily, like rice, oats, pasta and flour, because you can see the level at a glance. You don't need to decant everything. Cans and jars are already in good containers, and a label on a bin does the same job for a pile of packets. If you do decant, keep the cooking instructions: cut them off the bag and tape them to the container.
One thing that isn't a pantry job: leftover canned food. The USDA says unused canned food can be refrigerated in the can, but recommends a glass or plastic container for the best quality and flavor.
Step 5: First in, first out
Organizing by category is only half of it. The other half is the order within each category. When you put the shopping away, move the older items to the front and put the new ones behind them, so the oldest gets used first. Restaurants call it first in, first out.
The USDA suggests checking your pantry every few weeks and using canned goods you've had on hand for a while. Not all cans last the same time. On the USDA's chart, high-acid canned food like tomatoes and fruit keeps its best quality for 12 to 18 months, while low-acid canned food like beans, soups and vegetables keeps for 2 to 5 years. Rice and dried pasta keep for 2 years. So within the canned goods zone, it's worth putting the tomatoes where you'll see them.
For the full list of how long staples keep, see the storage table in our pantry staples list.
Step 6: Keep it organized
A pantry stays organized if putting things away is easy and the mess gets caught early. A few habits that help:
- Put the shopping away by category, straight into its zone, not onto the nearest gap.
- Keep one "open" spot per category. One open bag of pasta in front, unopened ones behind or on the backstock shelf.
- Do a five-minute reset once a month. Put strays back, bring older food forward, and note what's running low.
- Adjust the zones. If one category always overflows and another sits half empty, swap their shelves. The layout should follow how you cook.
- Use the same categories in the fridge and freezer. Dairy on one shelf, leftovers in an "eat first" spot, meat on the bottom. Our freezer inventory guide and 12 habits to reduce food waste cover those.
How Panzy helps you keep it organized
Panzy is a pantry inventory app for iPhone. It sorts what you own the same way a well-organized pantry does: every item has a category and a storage location.
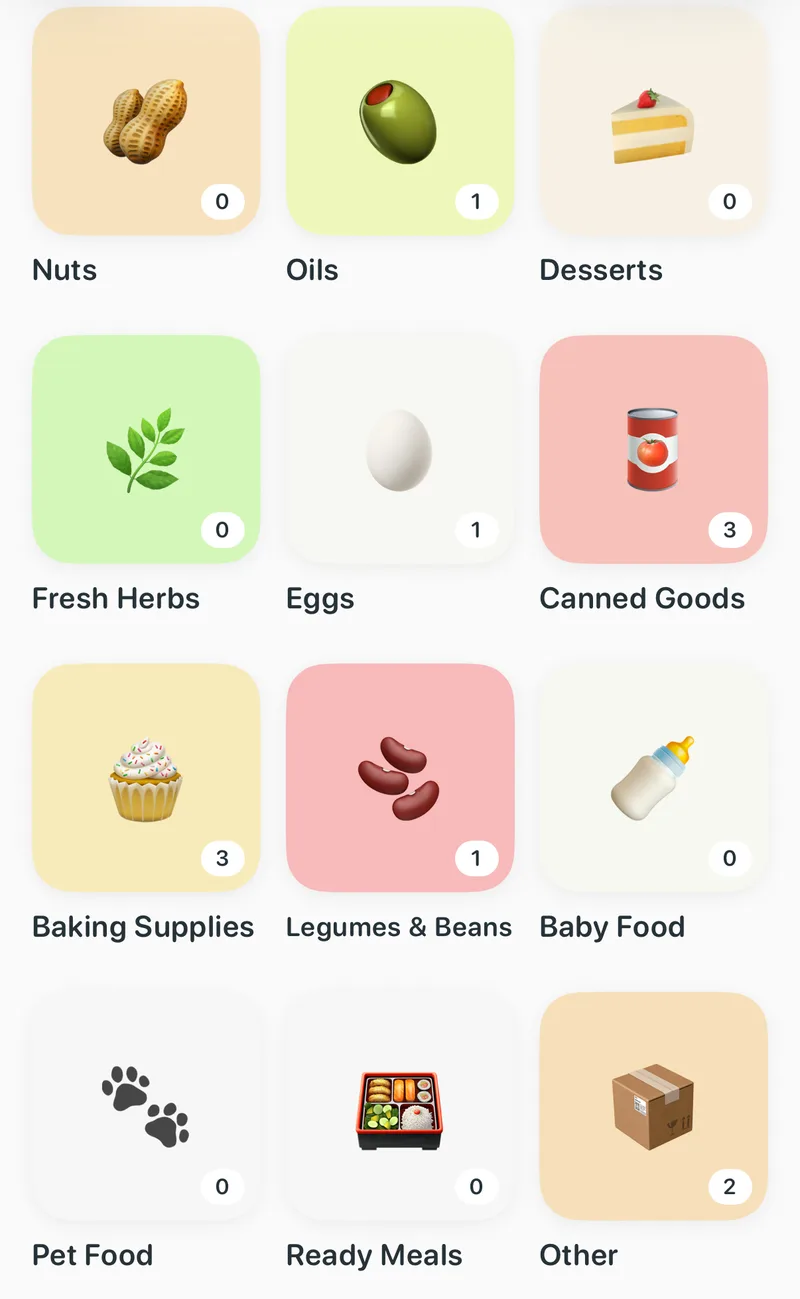
- Categories built in. Pick from built-in categories like Canned Goods, Grains, Pasta, Baking Supplies, Legumes & Beans, Spices, Condiments, Snacks and Beverages, each with its own emoji. The Pantry tab has a Categories row, and tapping one shows every item in it.
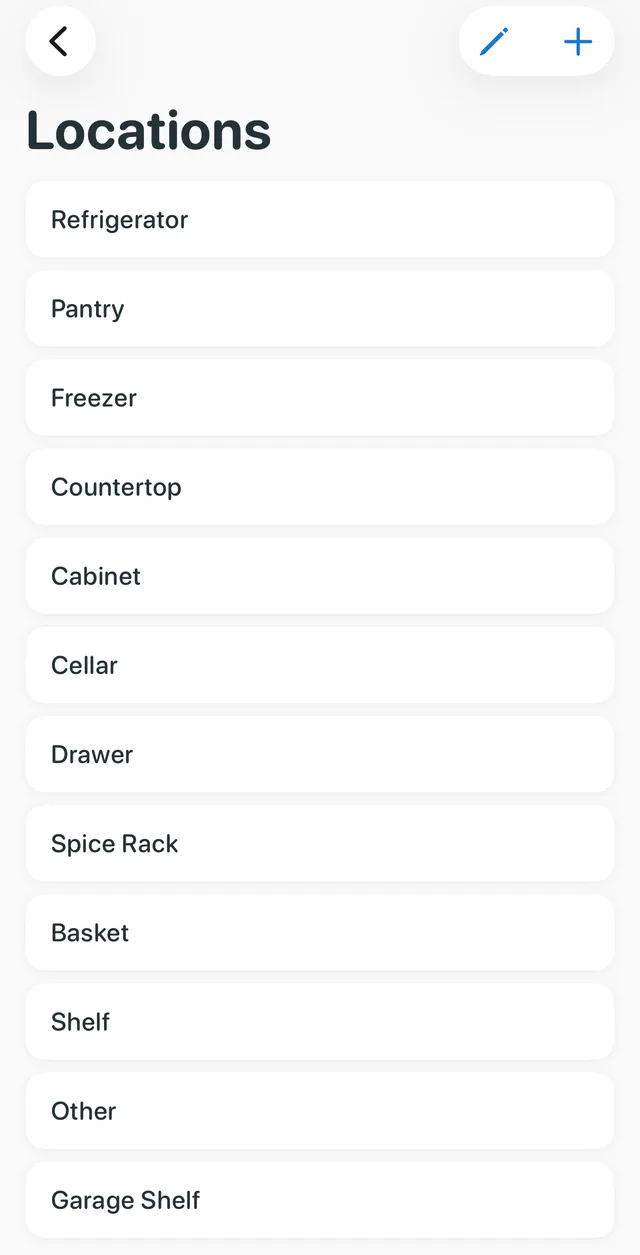
- Locations to match your kitchen. Besides Pantry, Refrigerator and Freezer, there are Cabinet, Shelf, Spice Rack, Drawer, Basket, Countertop, Cellar and Other. With Panzy+ you can add your own, like "Garage Shelf".
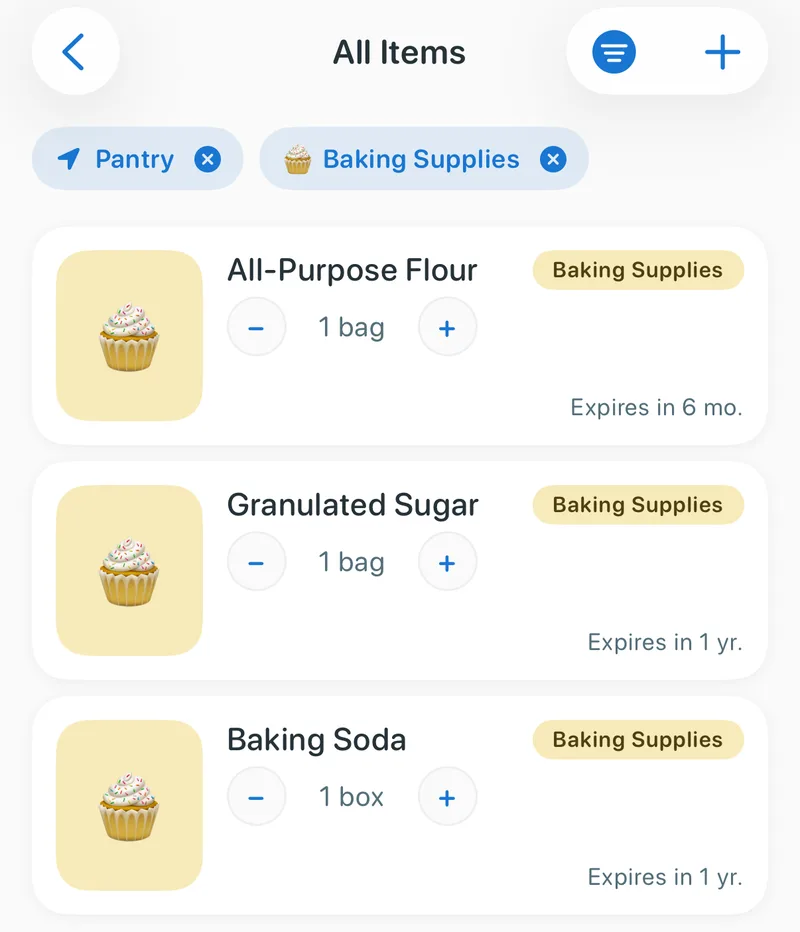
- Filter by location and category together. On the All Items list, filter to the Pantry location and the Baking Supplies category to see exactly what's on your baking shelf, and how much, without opening the cupboard.
- Put categories in your order. Drag categories into the order that matches your shelves. With Panzy+ you can also add your own categories with any emoji.
- A shopping list in the same order. Group the shopping list by category and the sections follow your category order, so you can shop and unpack one zone at a time.
Adding items is quick: scan the barcode to fill in the product details, then pick the category and location. Set a low-stock level on the staples you never want to run out of, and Panzy flags them when you get down to it. The free version tracks up to 50 items. Panzy+ adds unlimited items, custom categories and locations, the automatic shopping list, iCloud sync across your Apple devices, and no ads.
Panzy: pantry tracker
Track what's in your pantry, fridge and freezer, see what is expiring soon, and keep a shopping list that knows what you're low on. Free for up to 50 items.

Common questions
What are the main pantry categories?
Most pantries work well with canned goods, grains and pasta, beans and lentils, baking, oils and vinegars, spices, condiments and sauces, breakfast, snacks, drinks, and a backstock shelf. Merge or split them to match how you cook.
Should I put everything in clear containers?
No. Clear containers help with food you use steadily, like rice, oats, pasta and flour, because you can see when you're running low. Cans, jars and bottles are fine as they are. If you decant, label the container with what it is and the date.
Where should canned goods go in the pantry?
On a lower or middle shelf, since they're heavy, in a cool, dry spot. The USDA says temperatures below 85°F (29°C) are best and to avoid storing them near the stove, under the sink, or in a damp garage or basement. Put newer cans behind older ones.
How often should I reorganize my pantry?
A full empty-and-sort once or twice a year is plenty if you do a five-minute reset each month and put the shopping away by category. The USDA suggests checking your pantry every few weeks so older cans get used.